For the HD TAB 4, 7, 700, 900 & 9
For TAB 5 & 7 ULTRA series
For the EASY METER by PRIME DIGITAL series
For the HD LIGHT, COMPACT, FLASH, TOUCH, PRO & PROTAB
The “REQUIRED DATALOGGER” function allows you to recall all measures (LOGGER) previously stored in the instrument.
Note:
STANDARD PROCEDURE:
1) Turn on the instrument,
2) Make sure you have selected your language,
3) Rotate the encoder and select the “MEMORY” icon (see figure 1),
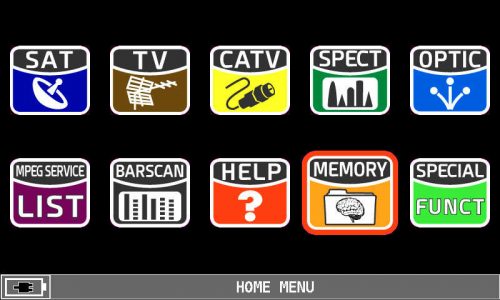 |
| Figure 1: HOME MENU, MEMORY icon selection |
4) Press the encoder to confirm,
5) Rotate the encoder and select “RECALL DATALOGGER” (see Figure 2),
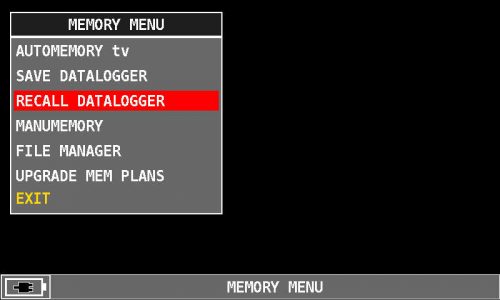 |
| Figure 2: Select “RECALL DATALOGGER” |
6) Press the encoder to confirm,
7) Rotate the encoder and select the “Data File” entry (see Figure 3),
8) Press the encoder to confirm,
9) Rotate the encoder and select “LOG” (LOGGER) where the measurements have been saved, for example “LOG. 1” (see figure 3),
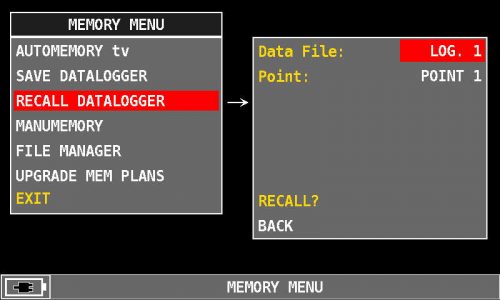 |
| Figure 3: Selecting the LOG number to call, for example “LOG. 1” |
10) Press the encoder to confirm,
11) Rotate the encoder and select the item “Point:” (see figure 4),
12) Rotates the encoder and selects the “POINT” to be called, for example “POINT 1” (see figure 4),
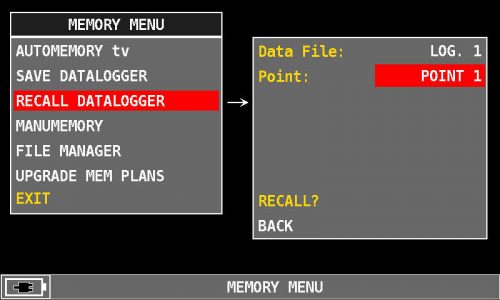 |
| Figure 4: Selecting POINT number to call, for example “POINT 1” |
13) Press the encoder to confirm,
14) Rotate the encoder and select “RECALL?” (See Figure 5),
 |
| Figure 5: Select “RECALL?” |
15) Press the encoder to confirm,
16) Rotate the encoder to navigate the measurements (see figure 6),
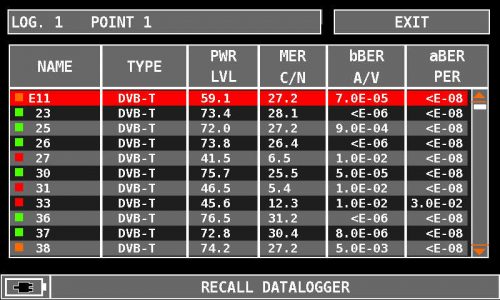 |
| Figure 6: Example of DATALOGGER, channels / measurements. |
17) Press the encoder to select “EXIT” and press it again to exit the screen (see figure 7) and return to the “LOG” and “POINT” selection screen (see figure 5).
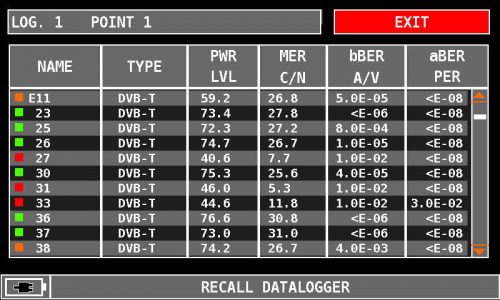 |
| Figure 7: “EXIT” selection |
Note: The MENU (written and graphic) of the figures shown in the following “F.A.Q.” may vary from model to model or depending on SW upgrade.

