The Wide Band LNB has only two polarizations: Vertical and Horizontal. The concept of high and low band disappears with these LNBs since low and high bands are stacked together on a wider band: 230-2350 MHz. There is only one Local Oscillator at 10410 MHz for both polarizations. Wideband is often associated to Multiswitches and LNBs that support dCSS and/or dSCR signal protocols in order to feed, with one coax cable, multiple STBs or one SKYQ™ STB.
1) HD TAB 7 Lite & Evo, HD TAB 700 & 700 Plus, TAB 5 SAT & Lite & ULTRA, TAB 7 ULTRA and HD TAB 900 Plus:
WIDE BAND SETUP
Update your meter with the latest available Firmware: greater than version 3.14 and upload to your meter the “chn” memory PLAN with the SMART PC interface programme. The “chn” file is updated constantly, always check our web site for updates. You may find these files in Rover’s web site www.roverinstruments.com in the update software area.
– Press the “Volume” key to access the configuration menu and select SAT, set the “LNB L.O.” as “WIDE BAND” (ref. fig. 1).
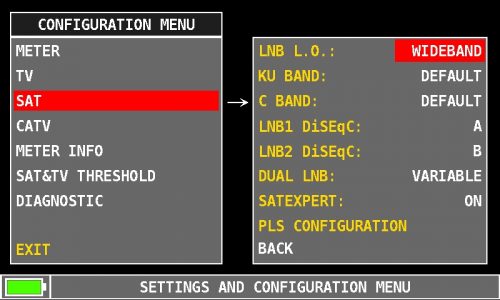
Fig.1
– Press the PLAN key and select the “chn” PLAN mentioned above, that in this example we call “AS28SQ” MANU MEMORY plan, this file has all Vertical and Horizontal ASTRA 28 transponders grouped together. This will make it easier to work with a WB LNB (ref. Fig. 2).
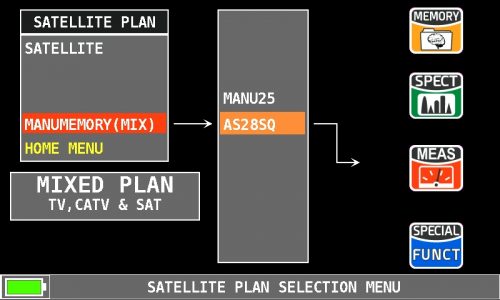
Fig.2
– Go to SPECTRUM or SAT measurement mode and start working with the WB LNB.
LOGGER with a WB LNB:
To run a logger with a WB LNB use the “SOTP&GO” logger feature. In the main menu select the “MEMORY” icon and from the resulting MENU, select for the “SAVE DATA LOGGER” entry “TV&WbandLNB” (ref. fig.3). Then follow the instructions the meter will display.
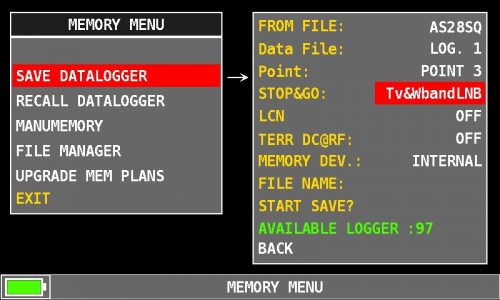
Fig.3
NOTES:
a) You will be able to measure all transponders within the converted “L” band frequency of the meter: 930 and 2600 MHZ, If by any reason a transponder frequency is out of the meter frequency range, “12660?0” will appear as a frequency value for that transponder.
b) The “chn” MEM plan transponders contains only those transponders that are inside the converted “L” band of the meter.
c) If you select any other satellite in the pre-memorized “SATELLITE PLAN” list, you may work with a Wide Band LNB but transponders will not be grouped as Vertical and Horizontal. You may do this grouping by utilizing the SMART programme.
dSCR SETUP:
a) From the main menu, select the “SPECIAL” icon.
b) select “dSCR-SKY UK” LNB TYPE for “SAT SCR/dCSS” (ref. fig.4).
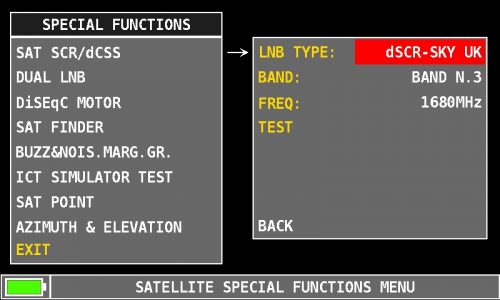
Fig.4
c) Then select one of the 16 available USER frequencies.
d) Go to SPECTRUM or MEAS mode and start measuring.
e) On the bottom left side of the screen, the selected User Band will be displayed during your measuring activities (ref. fig 2).
f) To test all user bands at once, select ”TEST” (ref. fig.4) and all 16 User bands will be tested at once (ref. User’s Guide).
2) HD TAB 4 EASY & TOUCH Wide Band LNB setup.
WIDE BAND SETUP
Update your meter with the latest available Firmware: greater than version 2.33 and upload to your meter the “chn” memory PLAN with the SMART PC interface programme. The “chn” file is updated constantly, always check our web site for updates. You may find these files in Rover’s web site www.roverinstruments.com in the update software area.
– Press the “Volume” key to access the configuration menu and select SAT, set the “LNB L.O.” as “WIDE BAND”, (ref. fig. 5).
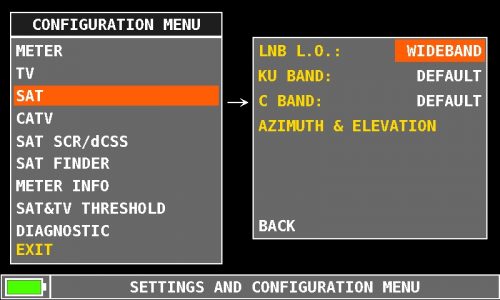
Fig.5
– Press the PLAN key and select the “chn” PLAN mentioned above, that in this example we call “AS28SQ” MANU MEMORY plan, this file has all Vertical and Horizontal ASTRA 28 transponders grouped together. This will make it easier to work with a WB LNB (ref. Fig. 6).
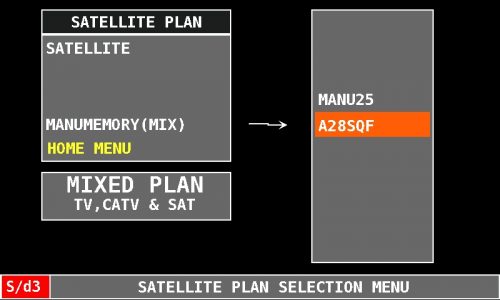
Fig.6
– Go to SPECTRUM or SAT measurement mode and start working with the WB LNB.
LOGGER with a WB LNB:
To run a logger with a WB LNB use the “SOTP&GO” logger feature. In the main menu select the “MEMORY” icon and from the resulting MENU, select for the “SAVE DATA LOGGER” entry “TV&WbandLNB” (ref. fig.7). Then follow the instructions the meter will display.
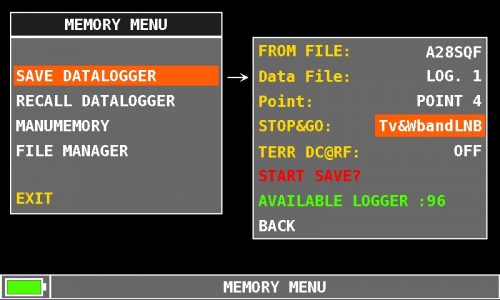
Fig.7
NOTES:
a) You will be able to measure all transponders within the converted “L” band frequency of the meter: 930 and 2150 MHZ, If by any reason a transponder frequency is out of the meter frequency range, “12660?0” will appear as a frequency value for that transponder.
b) The “chn” MEM plan transponders contains only those transponders that are inside the converted “L” band of the meter.
c) If you select any other satellite in the pre-memorized “SATELLITE PLAN” list, you may work with a Wide Band LNB but transponders will not be grouped as Vertical and Horizontal. You may do this grouping utilizing the SMART programme.
dSCR setup:
a) Select “SAT SCR/dCSS” in the Configuration menu.
b) Choose “dSCR-SKY UK” LNB TYPE (fig.8).
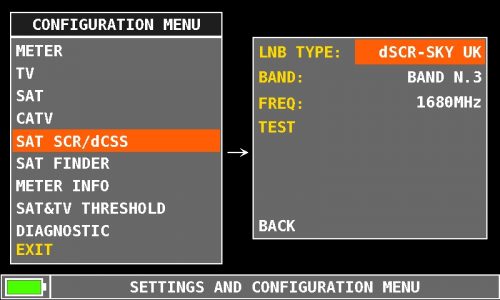
Fig.8
c) Select one of the 16 available USER frequencies.
d) Go to SPECTRUM or MEAS mode and start measuring.
e) On the bottom left side of the screen, the selected User Band will be displayed during your measuring activities (ref. fig 6).
f) To test all user bands select ”TEST” ( ref. Fig. 6) and all 16 frequencies will be checked at once as described in the User’s Guide.
