For the HD TAB 4, 7, 700, 900 & 9
For TAB 5 & 7 ULTRA series
For the EASY METER by PRIME DIGITAL series
For the HD LIGHT, COMPACT, FLASH, TOUCH, PRO & PROTAB
Using the instrument keyboard you can create directly in the instrument, MANUAL MEMORY PLANS, such as MANU 1, MANU 2, MANU 3, etc., by storing a list of your favorite TV channels.
STANDARD PROCEDURE:
1) Turn on the instrument,
2) Make sure you have selected your language,
3) Press the “TV” key,
4) Press the “HOME” key,
5) Rotate the encoder and select the “MEMORY” icon (Figure 1),
 |
| Figure 1: HOME MENU, MEMORY icon selection |
6) Press the encoder to confirm,
7) Rotate the encoder and select “MANUMEMORY” (Figure 2),
8) Press the encoder to confirm,
9) Press the encoder again,
10) Rotate the encoder and select a free “PLAN” manual memory of your choice: for example “MANU 2” (Figure 2),
11) Press the encoder to confirm,
12) Rotate the encoder and select “START EDIT” (Figure 2),
 |
| Figure 2:“MANUMEMORY”, “PLAN” and “START EDIT” written selection |
13) Press the encoder to confirm,
14) Press the encoder again,
15) Rotate the encoder and select “MODIFY ITEM” (Figure 3),
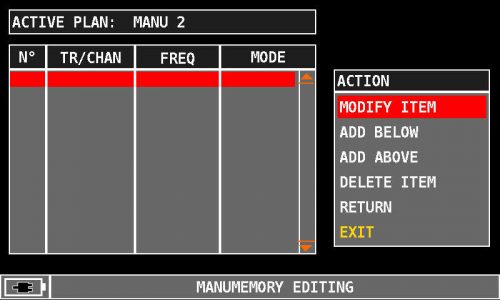 |
| Figure 3: “MODIFY ITEM” written selection |
16) Press the encoder to confirm,
17) Rotate the encoder and select “MODE” (Figure 4),
18) Press the encoder to confirm,
19) Rotate the encoder and select “DVBT&T2” (Figure 4),
20) Press the encoder to confirm,
21) Rotate the encoder and select “CHANNEL” (Figure 4),
22) Press the encoder to confirm,
23) Rotate the encoder and select the TV channel you want to store (eg E5),
24) Press the encoder to confirm,
25) Rotate the encoder and select “BW” (bandwidth) (Figure 4),
26) Press the encoder to confirm,
27) Rotate the encoder and select the exact baum width value:
28) Press the encoder to confirm,
29) Rotate the encoder and select “SAVE?” (Figure 4),
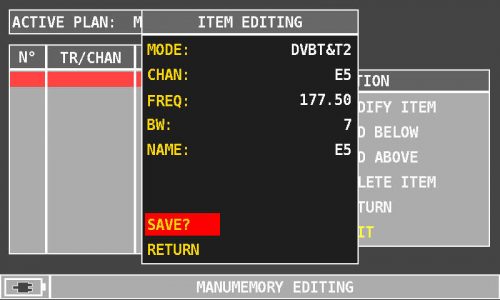 |
| Figure 4: Selecting all parameters and “SAVE?” |
30) Press the encoder to confirm (Figure 5),
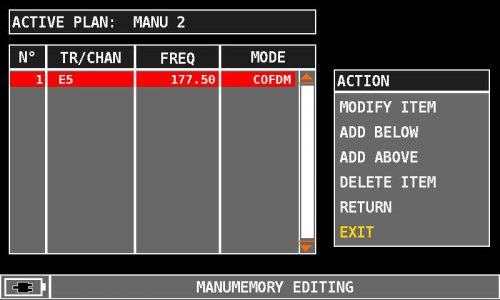 |
| Figure 5: Manual channel memory created |
31) To continue adding a new channel below the previously stored channel to the same MANUAL MEMORY, select “ADD BELOW” (Figure 6) and proceed as indicated in step 20 forward,
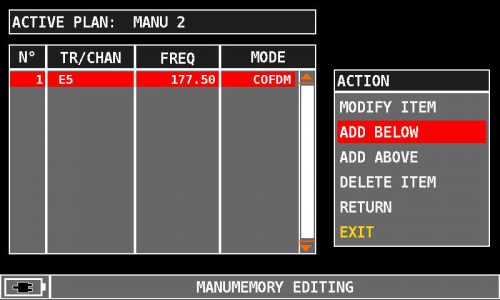 |
| Figure 6: “ADD BELOW” written selection |
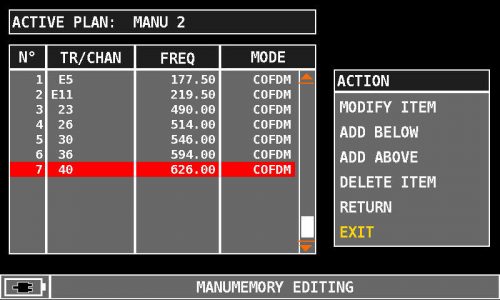 |
| Figure 7: Channels E11, 23, 26, 30, 36 and 40 added under channel E5 |
32) To add in the same channel NEW MEMORY channel above the previously stored channel (in the example of Figure 8 the channel 23), select the word “ADD ABOVE” (Figure 8) and proceed as indicated in point 20 forward,
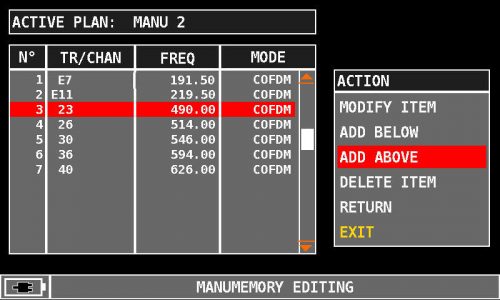 |
| Figure 8: “ADD ABOVE” written selection |
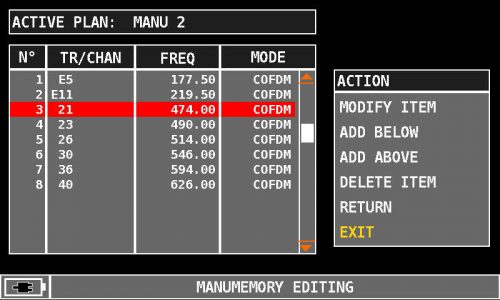 |
| Figure 9: Channel 21 added on channel 23 |
33) To replace a previously stored channel, after selecting the channel to be edited (in the example shown in Figure 10, channel E5), select “MODIFY ITEM” (Figure 10) and proceed as follows As indicated in step 20 above,
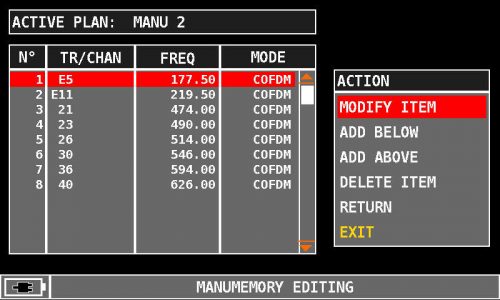 |
| Figure 10: “MODIFY ITEM” written selection |
 |
| Figure 11: Channel E5 edited in E7 |
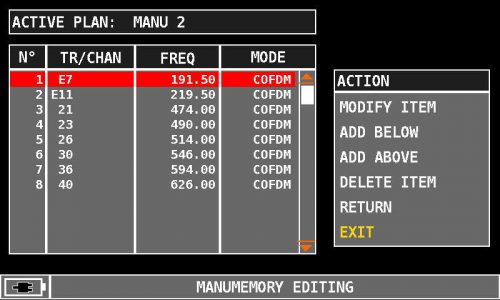
34) To delete a previously stored channel, after selecting the channel to be deleted (in the example of Figure 12, channel 36), select the “DELETE ITEM” message (Figure 12).
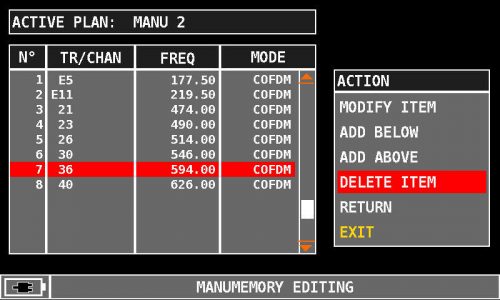 |
| Figure 12: “DELETE ITEM” written selection |
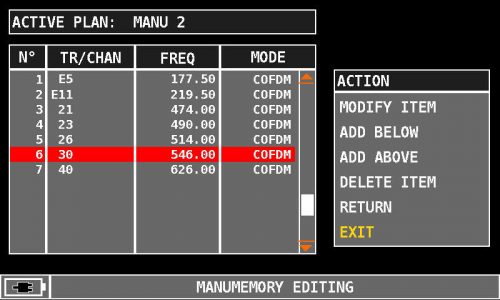 |
| Figure 13: Channel 36 deleted |
Note: The MENU (written and graphic) of the figures shown in the following “F.A.Q.” may vary from model to model or depending on SW upgrade and without notice.

